Wednesday, April 28, 2010

Low-Temperature Sous Vide Chicken Breast

Chicken must be cooked to 165 or else it can harbor salmonella, right? WRONG. I found this to be interesting as well! In a post on Kenji Alt's column on Serious Eats, I was introduced to the concept of cooking chicken to a temperature of less than 165 (i.e. well-done) in order to preserve moisture and improve flavor. Sound familiar? Sound like something that we do with steak all the time? Yep!

So, here's the low-down: Killing bacteria in chicken is not simply a function of temperature reached, but also the time spent at that temperature. Here is a graph based on data found here that shows the amount of time that chicken (10% fat, worst-case scenario) must spend at a given temperature to achieve a 7-log(10) lethality of any salmonella present. In other words, by USDA's standards, it's clean.


You'll notice that the time necessary at 165 degrees is next to zero. This is the recommended done temperature for chicken because it's easy to achieve. The way you use this graph is first look at the desired temperature (on the left axis), follow the horizontal line toward the right until you hit the red curve, and then trace a line downward from that point on the curve to find the minimum hold time at that temperature. Want to play it safe? Don't get it hotter, just hold it longer! The meat will get a bit more tender as a result, but won't get any dryer. DISCLAIMER TIME: Cook chicken at a temperature lower than 165 at your own risk! I've given the link to USDA's data, and that is what you should refer to. My graph is simply a visual aid!

Alright... let's try some "not quite done, but perfectly safe-to-eat" chicken!

We'll be cooking this chicken with the sous vide method. If you're hearing this term for the first time, please read my other posts on the subject as well as the pages I link to. Although Kenji Alt cooked his to 140, I'm gonna go for 150, which should be nice and juicy without being medium rare. I'm not as hardcore as he is. ;-) The plan is to cook the chicken to the desired doneness in the crock pot, then sear the chicken in a hot pan of olive oil.

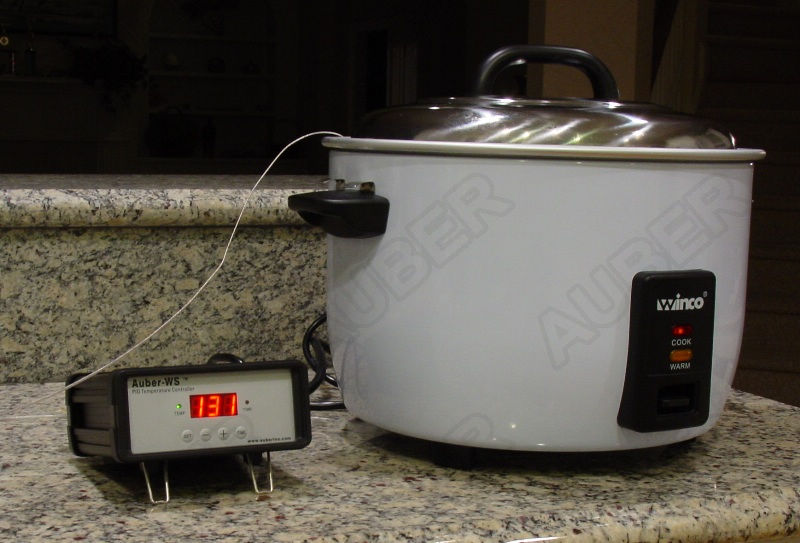
First off, I've found a nice new way to cook sous vide, other than the expensive option or the do-it-yourself method. It's not foolproof, but it's pretty good.

My buddy Scott Derham turned me on to a really nice crock pot that he has, made by Hamilton Beach, which is sold at Wal-Mart for less than $50. It includes a temperature probe for heating food to a programmable temperature. When used in the proper mode, the crock pot can heat up quickly to whatever temperature you set, and then it goes into "warm" mode where it will more or less hold temperature over time. It's meant to control cooking based on the internal temperature of a roast, chicken, etc., but when you fill the crock pot with water and just put the probe into that water, you have a temperature-controlled water bath. It works well, as long as you don't want to go lower than 140, because that's the minimum temperature setpoint. Here it is:


At the point when it reaches target temperature and goes into "warm" mode, it's really not reading temperature anymore, but is actually just heating at a constant power level. I've found that, with about half a crock full of water, it'll maintain about 137 degrees with no lid and 162 degrees with the lid on (while in a ~72 degree room). I had the lid on so that one side was latched down and the other side had about a 1/4" gap under the gasket, and it maintained 150.

I cooked four fresh chicken breasts seasoned with dried thyme, garlic powder and kosher salt. I seasoned the meat before putting it in the bag, which I've found re-constitutes dried herbs and spices. Desired? Sure, why not?


Once the chicken is in the bag, it's lowered into the water with the zipper open. I pushed on the bag with a plastic spoon to force the air pockets out and to make sure the chicken was laying in the bag in a single layer. Once the weight of the water has pushed all of the significant air pockets out of the bag, it might as well be vacuum sealed (but a lot cheaper!) I then zipped the bag up and folded it over inside the crock pot.


By the time I put the chicken into the crock pot it was at about 135, because I had started it up before I washed, trimmed and seasoned the chicken. I left it in there for 2 hours, even though I'm pretty sure it only took about 45 minutes or so for the chicken to reach temperature. According to my graph, it only needs to spend 3 minutes at 150, so I think this is PLENTY of overkill to play it safe. To keep the temperature regulated, I just adjusted the amount of gap between the lid and the crock on the left side. Pretty straightforward!

2 hours later, and we have some pretty ugly chicken! Notice the reconstituted herbs and spices. Yes, that's right, I turned back thyme. Sorry... that was really bad. Anyway, here are the pics:


We need to add some flavor and color to these plain-looking pieces of chicken. I got a 10" skillet with ~1 tbsp of olive oil smokin' hot and put some color on 'em, making sure to cook as hot as I could in order to minimize time on the heat and any further cooking of the fillet. The thyme and garlic caramelized/charred a bit, which added some additional flavor.

As you can see, this chicken turned out so moist! The texture was smooth, and you could almost chew it with your tongue!


I'll definitely be doing this again!

I also did a tri-tip a few days ago in this crock pot, and it turned out very well too. I just didn't take any pictures. The vacuum-sealed tri-tips from Costco can simply be tossed directly into the water and cooked in the package, then removed and pan-seared or grilled to get some extra flavor. Worked out very well!

I've ordered the parts to build my own sous vide temperature-controlled water bath, so keep an eye out in a couple weeks for my first runs with this setup. Also coming up is a writeup on the construction of my Ugly Drum Smoker (UDS).

Thursday, April 22, 2010

Sous Vide "Beer Cooler Hack" Calculator

I was introduced to the sous vide cooking method by Kenji Alt in his blog article Cook Your Meat in a Beer Cooler: The World's Best (and Cheapest) Sous-Vide Hack, which is a very interesting read (along with the supporting articles mentioned therein) if you're interested in learning about this exciting and versatile way to cook food.  "Sous vide" is French for "under vacuum", which refers to the fact that you put the food inside of a vacuum-sealed bag (I use a Ziploc bag), and then submerge it in hot water.  To cook sous vide in a beer cooler (ice chest), you simply put water in the ice chest that is slightly hotter than the final desired temperature of the food.  Pop the food into the ice chest, the water cools down, the food warms up, and hopefully you end up with everything reaching equilibrium at the desired final food temperature.

In trying this, the biggest question in my mind was "how much hotter must the water be?"  It obviously depends on several factors, mainly being the amount of meat vs. the amount of water.  The more water there is, the less the water temp will drop as the meat is heated up.  In addition to that, you lose some heat through the walls of the ice chest.

Of course, being the geek that I am, I resorted to Excel to solve my problems.  I put together a spreadsheet, based on some published specific heat capacity data for various foods, that will predict how hot the "bath water" needs to be in order to arrive at the desired result (download HERE.)  I still need to validate it, but it's based on this fairly simple equation for heat transfer between two quantities of two different materials reaching equilibrium in a closed system:

mass(food) * specific heat(food) * deltaT(food) = mass(water) * specific heat(water) * deltaT(water) - some heat lost

DeltaT(food) will be positive, deltaT(water) will be negative, and everything will end up at the same final temperature (the desired done temp). All of these parameters are pretty well-known, so the result should be predictable.  The beauty of having it in a spreadsheet is that you can play with the numbers and realize that you don't need a huge ice chest full of water to do this... it can be done with a fairly small quantity of water.  The last tri-tip I did only used 2 gallons of hot water.  Without this spreadsheet, I would never have guessed that 2 gallons would be enough, but it was!

FYI, I included in the spreadsheet the ability to account for frozen meat by taking into account the latent heat of fusion of the meat as well as its different specific heat capacity as frozen vs. thawed.

Click on the image to download the spreadsheet.

Low-Cost Plug and Play Sous Vide Controller

I was doing a search for a PID controller enclosure, and ran across the website for Auber Instruments (http://www.auberins.com). They make a plug and play sous vide controller that will directly operate up to an 1800W heated vessel, such as a rice cooker or a crock pot. This is a great alternative for someone who has a rice cooker and sitting around, and it's worth $139.50 to not have to cobble up something to control it. The controller can be found here.  Nice, clean design!  I like it!

They also make a variety of other controllers suitable for sous vide cooking, as well as other applications.  They sell sensors, solid state relays and PID controllers for those who want to build their own system as well.


Tuesday, April 20, 2010

Sous Vide Tri-Tip

Well, I decided to start a blog. What's the saying? "Blogging: Never before have so many people with so little to say said so much to so few." Well, I hope this isn't the case here. I'm going to keep it concise and interesting, or at least I'll try.

So, on with the topic at hand. I've been playing with Sous Vide cooking, where food is cooked inside of plastic bags in heated water very slowly. It works very well on steaks, vegetables, eggs, etc. For meats, it allows you to cook the piece of meat to a desired doneness consistently through its thickness. It's pretty much foolproof. If you want your meat to end up at 135 F, you make sure your water bath stays at 135 F and leave the meat in there long enough to reach that temperature. So far, I've been doing the "beer cooler hack" version of sous vide cooking, and more information on that can be found here: http://www.seriouseats.com/2010/04/cook-your-meat-in-a-beer-cooler-the-worlds-best-sous-vide-hack.html

I've done ribeye steaks and *tried* to do some tri-tips so far, but was short on time on both occasions.  The steaks came out pretty good, but I didn't have time to get the tri-tips up to the desired temperature and had to grill them until they were done. Tonight I cooked a 1 lb, 13 oz. tri-tip, and it turned out great. Here's the story.  

The piece of meat shown here is a USDA choice tri-tip from Costco. It's not the pre-marinated variety... it's just straight up tri-tip. I put a McCormick's Grill Mates Steak rub on it. Pretty tasty stuff.

Next, I filled my ice chest with hot water. The plan was to cook the meat to an internal temp of 130 F (medium rare), so I started the water off at 141 F (based on the prediction by a spreadsheet I put together here). I either made a bad spreadsheet or more heat was lost through the sides and top of this ice chest than I expected, because I had to add hot water a couple times while it was cooking in order to maintain bath temp.

After taking out the meat at 130 F and feeling how floppy and raw it seemed, I decided to take it up to 135 F. I put more hot water in there and let it sit until the water was 137 F and the center of the meat was 135 F. Done cooking!

Ready to come out of the water. Visible here is my water temp probe (on the right) and my meat temp probe (on the left, going into the bag and into the center of the meat). The corner of the bag where the probe wire comes out is kept above the water level so no water can get into the meat.

Technically, it's fully cooked. 135 F throughout.

Like I said, "technically" it's cooked. It isn't seared though, and that's no good. It's gotta have that browned meat flavor to it. I was going to hit it with my propane blowtorch, which is very common for this type of cooking, but it didn't seem to be going the way I'd expect it to. Also, the chunks of reconstituted garlic that you can see in the picture here were burning and turning to glowing coals before the meat was seared, and that wouldn't taste good. Consequently, I scraped all of the garlic pieces off with a butter knife and resorted to pan searing. I cranked up the burner, got the pan of olive oil smoking hot, slapped this bad boy in there, and gave it some color.

And here's the beautiful result: A piece of meat with constant doneness throughout, and that doneness is determined by the water bath temp. It's so easy! I'll never screw up a steak again!

With an iron skillet or a similar pan that holds heat better, the gray zone at the outer edges of the meat would be even thinner, but I'm not complaining. This is the best piece of beef I've ever cooked, and I have a feeling that this is gonna be a good summer. As it is, people know that if they come over to my house for dinner there's gonna be plenty of decent food, but lemme tell ya... we ain't seen nothin' yet.

This is definitely gonna be a good summer.